Looking for new ideas to celebrate birthdays, Valentine’s Day, or just have fun during quarantine times? Here are my chocolate fountain ideas for a spectacular and exciting way to celebrate and surprise your kids or anyone else in a HUGE and special way!
Best of all, it doesn’t cost a fortune! Here are my tips on where to get a chocolate fountain for around $25, how to set it up, what kind of chocolate to use, and which foods work best as dipping items.
Why a Chocolate Fondue Fountain?
Why the heck not? The visual appeal of seeing a flowing tower of velvety chocolate will stun any chocolate lover.
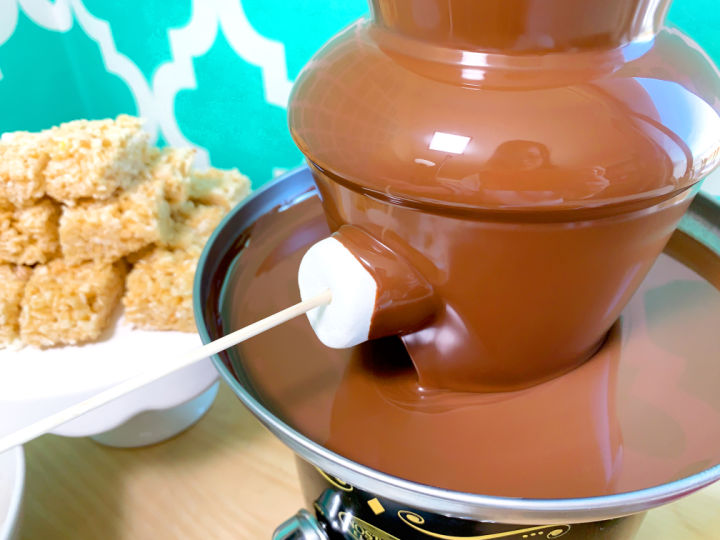
And it’s fun thing to do and makes you feel like a kid again. There’s something so satisfying about dipping a large, firm marshmallow into warm, dripping chocolate and then getting to taste it. And then getting to do it again and again.
We had a large chocolate fountain at our wedding and our guests flocked to it like kids in a candy store. It was the one thing that people fondly remembered about our wedding.
And now, chocolate fountains are available in smaller, more manageable sizes for home use.
This post contains affiliate links. If you make a qualifying purchase, I will receive a small commission, which helps support this blog. Thank you for your support!
Where to Buy a Chocolate Fountain?
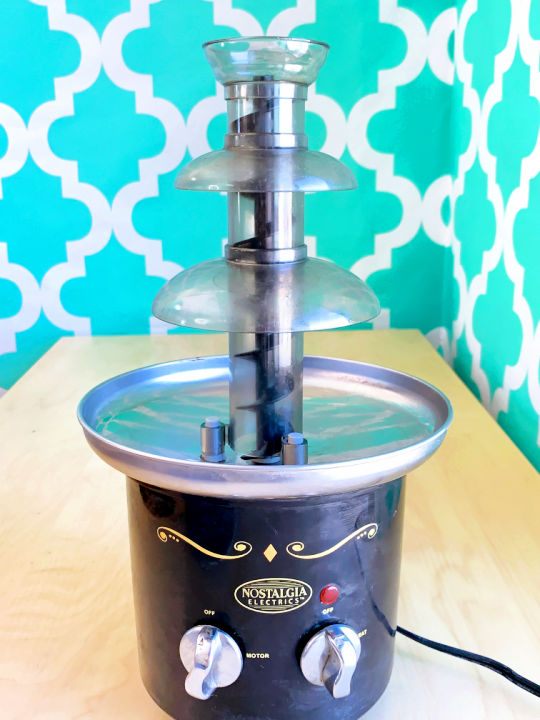
I have a 24 oz. Nostalgia Electrics Chocolate Fountain that you can buy on Amazon for just under $25! Unfortunately, the availability of this model and price have changed since I first posted this and did the YouTube video.
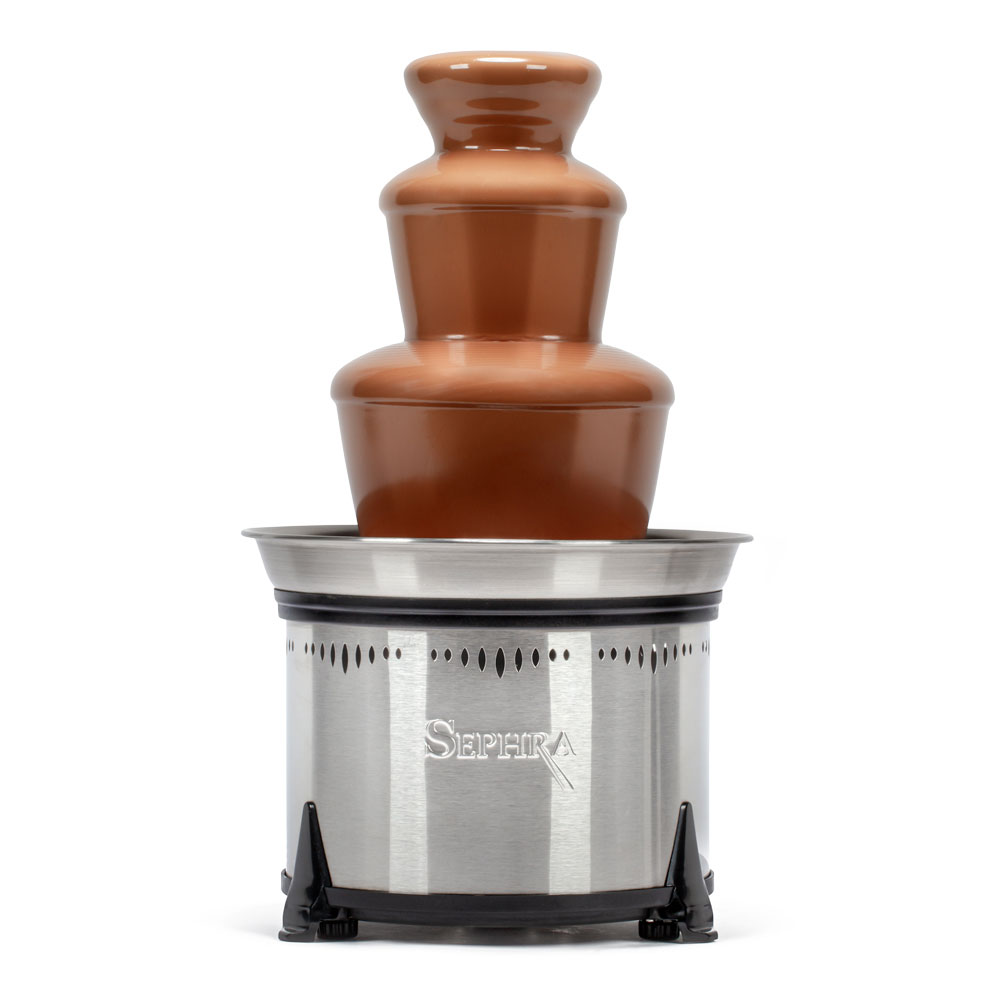
Here is another professional brand of chocolate fountain that I recommend, called Sephra, because they make excellent fountains that are QUIET and they ship the next business day! When I worked in the wedding industry, all the professional chocolate fountains that were at weddings were super quiet!
FYI: The cheaper chocolate fountains are noisy because of how it is made.
What Size Chocolate Fountain Do I Need?
FYI: the 16″ – 19″ Chocolate Fountains and Chocolate Melts are on sale!

Our friends gave it to us when they moved away and it has lasted more than 13 years! We used it when we first got it but then it stayed in storage for 7 years. We took it out on New Year’s eve and it was still working great.
Things to Know About Chocolate Fountains
I want to prepare you for the realities of owning your own chocolate fountain because there are things to be aware of.
1. Cheaper chocolate fountains can be loud.
The lower priced chocolate fountains like mine, can be loud. The pump is as loud as an older car running its motor (not a Tesla!).
So, it can be a little hard on your ears. But it didn’t bother my kids.
Want a quiet chocolate fountain? Check out Sephra chocolate fountains.
2. Chocolate fountains need to be properly leveled in order for it to flow evenly.
One thing that’s surprising about chocolate fountains is that they must be leveled in order for them work correctly. So the fountains themselves have built in levelers at the feet.
It might take some practice to get the hang of it. So if it’s your first time, give yourself some time to figure out how to level it.
3. You have to get the viscosity right for the chocolate to flow well.
When I did all semi-sweet chocolate with oil, the fountain flowed well. However, when I tried blending the chocolates while filming the video, it didn’t flow as well.
It could have been that I let the melted chocolate sit too long while I set up my filming background and other things. Or maybe something changed when I blended different chocolates.
I added more oil, a little at a time and let the fountain flow for more than 20 minutes. Eventually, the problem was corrected and the chocolate flowed better.
4. Clean up can be an ordeal.
Once you’re done with your chocolate fountain, you HAVE TO, have to clean it up right away! You can’t let the chocolate sit there after turning off the motor and heat or it will harden up.
Chocolate will harden at room temperature and make clean up very difficult! So do yourself a favor and clean up the chocolate fountain immediately after you’re done.
If you’re not ready to clean up, then let the fountain keep running until you’re ready.
5. You must melt the chocolate before adding it to the chocolate fountain.
FYI: Chocolate fountains do not melt chocolate. They are only built to keep the chocolate warm.
When I was a wedding videographer, I remember watching a large, professional chocolate fountain being set up. They poured in liquid chocolate into the fountain. And I have no idea how they melted the chocolate before and kept it warm until they arrived at the venue.
Melting chocolate is not difficult but it’s an extra step to think of when planning to set up your chocolate fountain. I detail how to melt chocolate below.
And this brings me to the next question.

Best Ways to Melt Chocolate for Dipping
There are several ways to melt chocolate. But something to keep in mind is that for chocolate fountains, you will melt chocolate with oil.
Whenever you melt chocolate, you need to use a double boiler, unless you use a microwave.
What is a double boiler?
A double boiler is a pot on top of another pot, meant for gently cooking delicate things like chocolate or hollandaise sauce. But you don’t have to go out and buy one.
I’ll explain how to use an Instant Pot or pot over a stove to make a DIY double boiler below.
With that in mind, choose the method that feels easiest for you.
1. Melt chocolate in the Instant Pot.
If you have an Instant Pot, you can use it as a double boiler. Add a cup of water into the Instant Pot. Press the Saute button and set it to Less mode.
When the water starts to simmer, place a metal bowl over the Instant Pot. Pour chocolate into it. Use a heat safe spatula to stir and melt the chocolate with one hand and while using the other hand to hold the bowl with an oven mitt.
Stir until lumps dissolve.
The reason I prefer the Instant Pot method sometimes, is that I can melt chocolate when I’m NOT in the kitchen. My filming area is in a room so it’s convenient to use an Instant Pot.
2. Melt chocolate in a pot over the stove.
In a pot over a stove, pour in water until it’s one or 2 inches deep inside the pot. Bring the water to a simmer.
Next, put chocolate into a heat safe bowl. Make sure bowl is larger than the pot so that it can sit on top of the pot.
Place bowl over the pot and let it sit on top of the pot. Grab an oven mitt and use one hand to hold the bowl. With the other hand, use a spatula or heat safe utensil to stir the melting chocolate.
Stir until lumps dissolve.
3. Melt chocolate in a microwave.
In a heat safe bowl like glass or ceramic, place chocolate inside. Heat bowl of chocolate in the microwave 30 seconds at a time. Stir after each time. Keep heating and stirring until no lumps remain.
Sometimes stirring will dissolve the last lumps.
This isn’t my preferred method because we have to mix oil into this mixture and there’s less control.
See: What Size Chocolate Fountain Do I Need?
What Chocolate to Use for Chocolate Fountains
They sell liquid chocolate for chocolate fountains but you don’t really need to buy that. You can use chocolate chips meant for baking chocolate chip cookies.
Semi-sweet chocolate chips are very sweet and I have used them for my chocolate fountain. However, it was TOO SWEET, like sickly sweet that I didn’t want to eat it. My kids, on the other hand, weren’t bothered by it.
I prefer to use a combination of different chocolates to create a less sweet, yet more complex, richer flavor.
Here’s the blend that I used, half semi-sweet chocolate, half milk chocolate, and a little bit of bittersweet chocolate.
Semi-Sweet Chocolate – has the most sugar of all the chocolates and works well in chocolate chip cookies
Milk Chocolate – has a more milky flavor and isn’t as sweet as semi-sweet
Bittersweet Chocolate – has the least amount of sugar for chocolates and contains more cacao in it for a richer, darker chocolate taste
If it sounds too complicated, by all means, use semi-sweet chocolate chips for your first time. Once you get the hang of working with chocolate, try experimenting with different blends of chocolate.
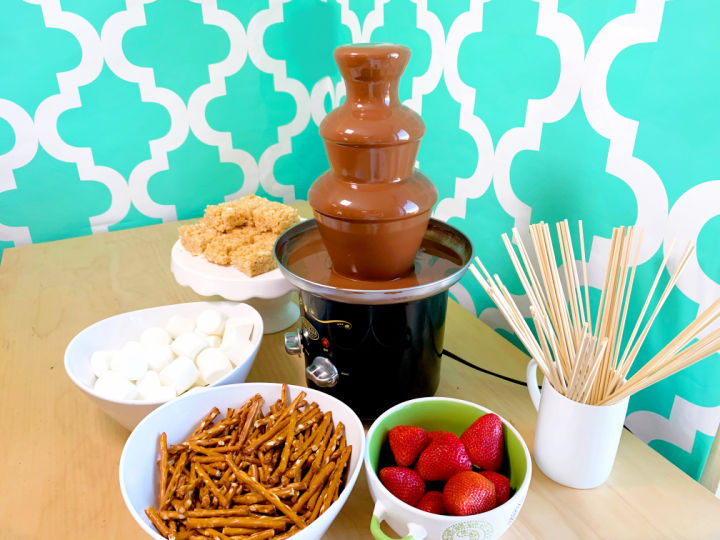
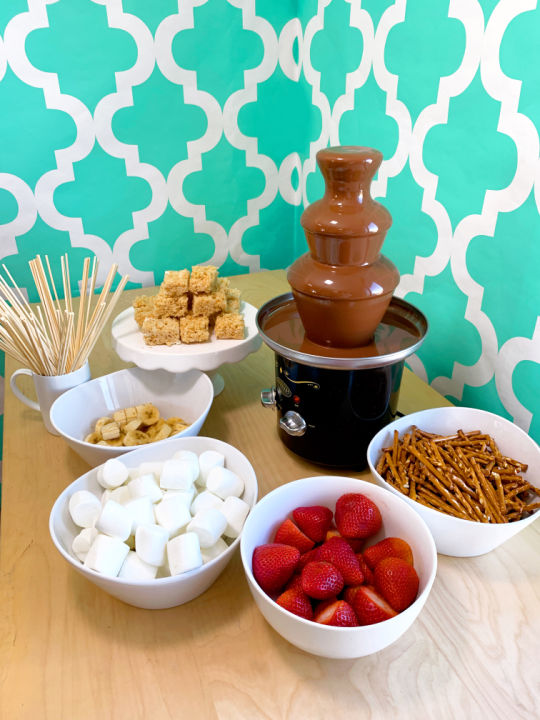
Chocolate Fountain Dipping Food Ideas
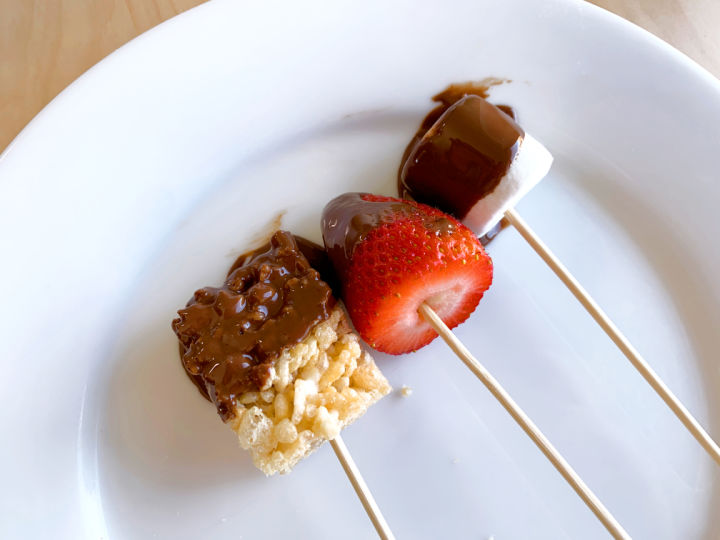
The best foods for dipping in chocolate are the ones that can sit and stay fresh at room temperature. Strawberries, large marshmallows, pretzel sticks, and rice krispy treats are my favorites.
I tried sliced banana because we had a lot of bananas around but they started browning and going mushy quickly that it didn’t even make it into the video.
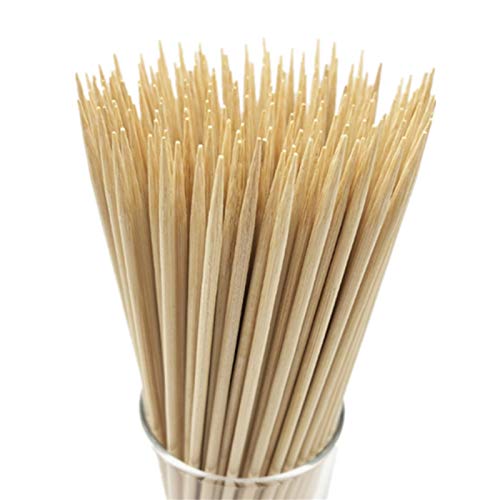
The food will also need to be held with a bamboo skewer stick or tooth pick to dip into the chocolate fountain.
Also, foods that have a long shape like pirouette cookies and pretzel sticks are great because that means you won’t need to add a skewer stick to them.
FRUIT
- Strawberries
- Raspberries
- Blackberries
- Grapes
- Apples
- Bananas (prepare right before serving as they brown fast) or use frozen bananas
POPULAR DIPPING ITEMS
- Large Marshmallows
- Pretzel Sticks
- Rice Krispy Treats
- Pirouette Cookies
- Mini Cream Puffs
- Biscotti
- Cake (cubed)
COOKIES
- Chocolate Chip
- Oreos
- Shortbread
- Graham Crackers
- Vanilla Wafers
OTHER IDEAS
- Donut Holes
- Popcorn
- Potato Chips
Chocolate Fountain Set Up and Recipe Video
Chocolate Fountain Recipe and Set Up Guide
Ingredients
IMPORTANT: I have added the recipes for a 2 lb. chocolate fountain AND a 24 oz. chocolate fountain. Please refer to the recipe based on your size chocolate fountain.
2 lb. Chocolate Fountain
- 18 ounces semisweet chocolate chips
- 16.5 ounces milk chocolate chips
- 1.5 ounce bittersweet chocolate
- 1 1/4 cup cooking oil canola, vegetable, or other neutral tasting
- marshmallows
- strawberries
- pretzel sticks
- rice krispy treats
OR
24 oz. Chocolate Fountain
- 12 ounces semisweet chocolate chips
- 11 ounces milk chocolate chips
- 1 ounce bittersweet chocolate
- 3/4 cup cooking oil
- marshmallows
- strawberries
- pretzel sticks
- rice krispy treats
Instructions
Melt the Chocolate – 3 Ways
INSTANT POT METHOD
- Add a cup of water into the Instant Pot. Press the Saute button and set it to Less mode.
- When the water starts to simmer, place a metal bowl over the Instant Pot. Pour chocolate into it. Use a heat safe spatula to stir and melt the chocolate with one hand and while using the other hand to hold the bowl with an oven mitt. Stir until lumps dissolve.
- Slowly pour in the oil and stir until full combined.
POT METHOD
- In a pot over a stove, pour in water until it's one or 2 inches deep inside the pot. Bring the water to a simmer.
- Next, put chocolate into a heat safe bowl. Make sure bowl is larger than the pot so that it can sit on top of the pot.
- Place bowl over the pot and let it sit on top of the pot. Grab an oven mitt and use one hand to hold the bowl. With the other hand, use a spatula or heat safe utensil to stir the melting chocolate. Stir until lumps dissolve.
- Slowly pour in the oil and stir until full combined.
MICROWAVE METHOD
- In a heat safe bowl like glass or ceramic, place chocolate inside. Heat bowl of chocolate in the microwave 30 seconds at a time. Stir after each time.
- Keep heating and stirring until no lumps remain. Pour in oil and mix until fully combined.
Set Up Chocolate Fountain
- Follow the video for visual instructions. Connect the corkscrew part to the base. Then place the tube over the base.
- Next, place the largest tier over the top of the tube until it stops at the locking point. Then place the second largest tier over the top of the tube until it stops at the locking point. For the smallest tier, turn it upside down so that the widest part faces up. Match the U shaped opening with the notch.
Turn On Chocolate Fountain
- Plug in chocolate fountain. On the chocolate fountain, turn on the heat setting. Let it heat up for at least 2 minutes. Then pour the melted chocolate into the base of the fountain. Next, turn on the motor. Let the motor run for 2 minutes. Then turn off the motor for 30 seconds but leave the heat setting on. After 30 seconds, turn the motor back on.
Level the Chocolate Fountain
- Let the chocolate fountain run for at least 5 minutes to let the chocolate flow adjust to the fountain. If one side is not flowing as well, lower the adjustment foot under that side. If the adjustment foot is at its lowest point, then try raising the other side.
- This process may take awhile. Also, if the chocolate seems too thick and doesn't flow like water, add 1/8 cup oil and let it run. If after a few minutes, it's still too thick, add another 1/8 oil again. The chocolate fountain should flow evenly with a continuous sheet of chocolate on all sides.
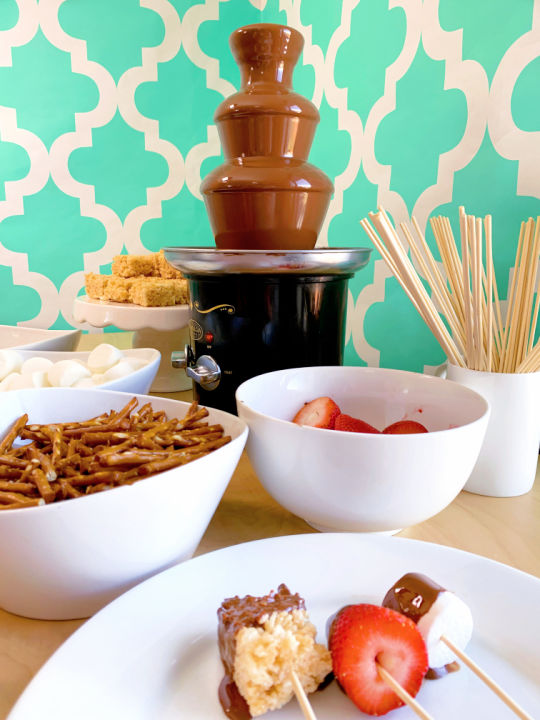
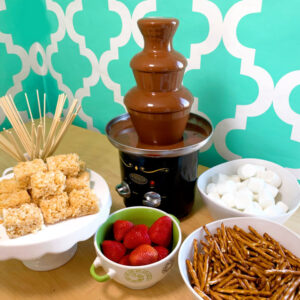
Set Out Dipping Items
- Set out bowls of dipping items like strawberries, large marshmallows, pretzel sticks, and Rice Krispy treats. Use a skewer or toothpicks to handle dipping items.
Where to Buy Equipment


This post contains affiliate links. When you make a qualifying purchase, I will receive a small commission at no extra cost to you.
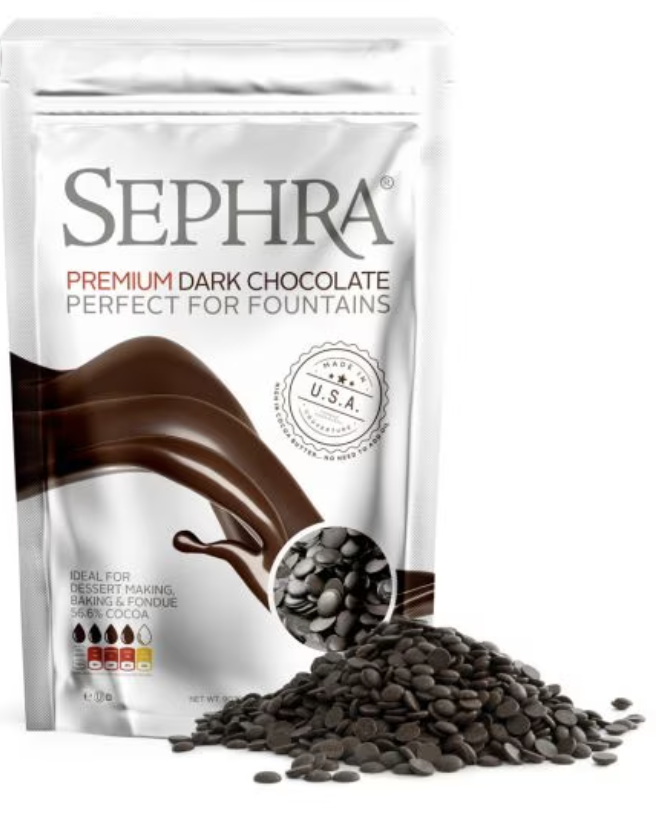
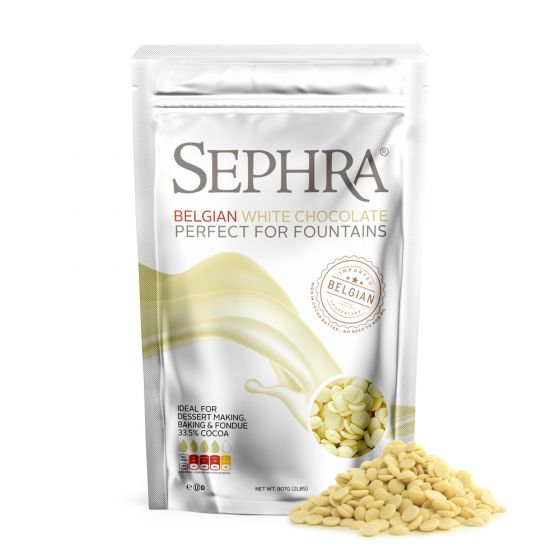
Don’t have time to make chocolate from scratch? Do what professionals do – use melting chips! They have white chocolate, Belgian dark chocolate, and milk chocolate. Check them out below.
Chocolate Melts
-
-
 Buy Now
Sephra's silky smooth Belgian White, fountain ready, couverture chocolate, runs perfectly in fondue fountains without the addition of oils or cocoa butters.
Pin for Later:
You Might Also Like:
- White Chocolate Fountain Ideas and Set Up Guide
- What Size Chocolate Fountain Do I Need?
- Creative Chocolate Fountain Dipping Ideas to Try
- Afternoon Tea at Home with Trader Joe’s Items
- Instant Pot Chocolate Covered Strawberries
- Chocolate Mochi Donuts
- Gourmet Hot Chocolate
- Make Mocha at Home without a Machine
That was some very good information about a chocolate fountain since I’ve been thinking about purchasing one and know nothing about them. The information you provided was straight to the point, honest and covered the most important aspects. Thank you for doing this and I hope you earn great commission on the purchases of the fountain. You deserve it! Unfortunately, after reading your details I’ve decided not to get one. There is just too much involved from set up to pack up. I’m going to check out your chocolate covered strawberries recipe in the Instant Pot and be happy with that!! Thanks again!
Thankyou!
Hi I have bought my first chocolate fountain looking forward to trying this out on Xmas Eve the tips where very useful many thanks
Great article. I just wish there was a chocolate that will harden after dipping.
Hi Judith, This chocolate does harden after dipping. You just have to wait a few minutes.
Does the 2lb chocolate recipe really only serve 6people?
That’s a great question, Aimee. I think it can feed more people for a party. I have never used up all the chocolate. But it also doesn’t hurt to have extra chocolate on hand as back up!
Hi, after reading your post I’m look forward to trying a chocolate fountain. I’m looking for suggestions on what size fountain to use for my daughter’s graduation. We will probably have 50-100 people, but over 2-3 hours time. I’ve seen everything from 1.5 to 4 lb fountains. What size do you suggest? Any idea how often it might need refilled?
Hi Cheryl,
For that many people, I would suggest hiring a professional to cater your chocolate fountain so that someone can attend to the fountain at all times. They would be able to handle a party like that, take care of all the details of making sure you have the right size fountain and enough chocolate, and refilling the dipping items. You can search chocolate fountain rentals in your area. With a party of your size, a lot can go wrong if you choose the DIY route.
Have you tried coconut oil?
No because we have a coconut allergy.
What is the best size bamboo skewers to use?
How much chocolate would you get for 25-30 people?
4 – 6 pounds. It’s better to have more than enough chocolate than not enough.